Translate

Showing posts with label Craft. Show all posts

Friday, 22 September 2017

Gotta poke a Pepe or two..


 My blogging may have been idle but me, not so much. I thought it was about time to show you a few bits of the geeky themed felting, I have been working on while in my 'quiet' months.


Can you guess what this one is?


Well if you're a Warcraft fan maybe you'll see a Pepe ... Or, if not, this is just brightly felted bird.


Starting to see double


Next up I tried out my hand at some 2D felting


Behold my strange murloc art aka Murloc merkin

*grins wickedly


I also decided to try out a cardinal or a Ganymede for those of you that are Overwatch fans.


And this one wouldn't show up with my terrible phone photography but it's a Kirby style heart for a gamer friend.


I'm not an expert but I'm finding felting a really fun and therapeutic thing to do, so you can prepare to see more of these cuties in future posts.


Wednesday, 25 January 2017

Crafty Catch Up


After being a little quiet on the crafting front I thought I might introduce you to my new love - felting. After flitting between all types of crafts I think I might have found the most therapeutic and enjoyable type for me.

Since I don't really have much space to craft (mostly because of all the crafting materials bursting the cupboard seams), I have found that felting is the perfect type of crafting to have on a small portion of desk. It's something I can even do using a lap tray which means it's even possible from a comfy sofa or bed - result.


When I first began felting I thought that using a premade kit with instructions would be the best way to start, yet as (probably) expected I really couldn't stick to the plan in practice. This really wasn't a reflection on the kit but more my own non crafting commitment issues: the kit I found was wonderful and I would recommend Bear Creek Design which I found on Etsy a few years back. The standard of the kit is great and it really did include everything I needed to launch a love of felting from.


The kit I chose was supposed to make a rabbit and included some good quality Romney wool which was lovely to work with and leaves a realistic furry finish. 


The Kit included two different size felting needles and a sturdy felting cushion.


You should also be careful not to start out felting with too much vigour as you might end up with a painful reminder not to do so in future.


Unfortunately for my bunny rabbit my mind was somewhere else and I soon realised that the felt creation I had started had other plans in who he wanted to be, so I just had to comply (this is completely normal being lead by some felted form..right?). In the end it turned out that my love for otters trumped my love for bunnies ... sorry bunnies.


And this was my end result:


Please bear in mind though that the kit had very clear instructions and pictures on how to make the actual cute bunny so you can't judge it by my otterly different result.

You can find the rabbit kit I used - HERE but I see there is now a very cute Thanksgiving Turkey one too.
Anyhow I hope this might encourage someone else to have a try at felting as it really is a lovely craft that sometimes looks a little daunting but is great fun once you just jump right in and not worry about how your earlier pieces look as long as it's enjoyed.


Saturday, 7 February 2015

One Boomkin & a Money Tree


The New Year has started or just about to restart dependent upon your calendar,  and I thought it high time I updated the blog with some crafty gifts which can now be shown.

For my geeky side of things I had wanted to try my hand at another plushie since the previous fire spirit was fun to make. So keeping the same Warcraft theme and using some felt again I set to work trying to create a gift for a friend who had a moonkin (aka boomkin) character.


For those of you not total geeks then this is what a moonkin should look like:

Moonkin with baby moonkin
Mine however was created using a bit of artistic license, and is more based on the baby than the adult :D


I only actually took photos of the finished article however the felt was pretty much cut freehand and hand stitched so it was a definite one off.

Hangin with me Owlie

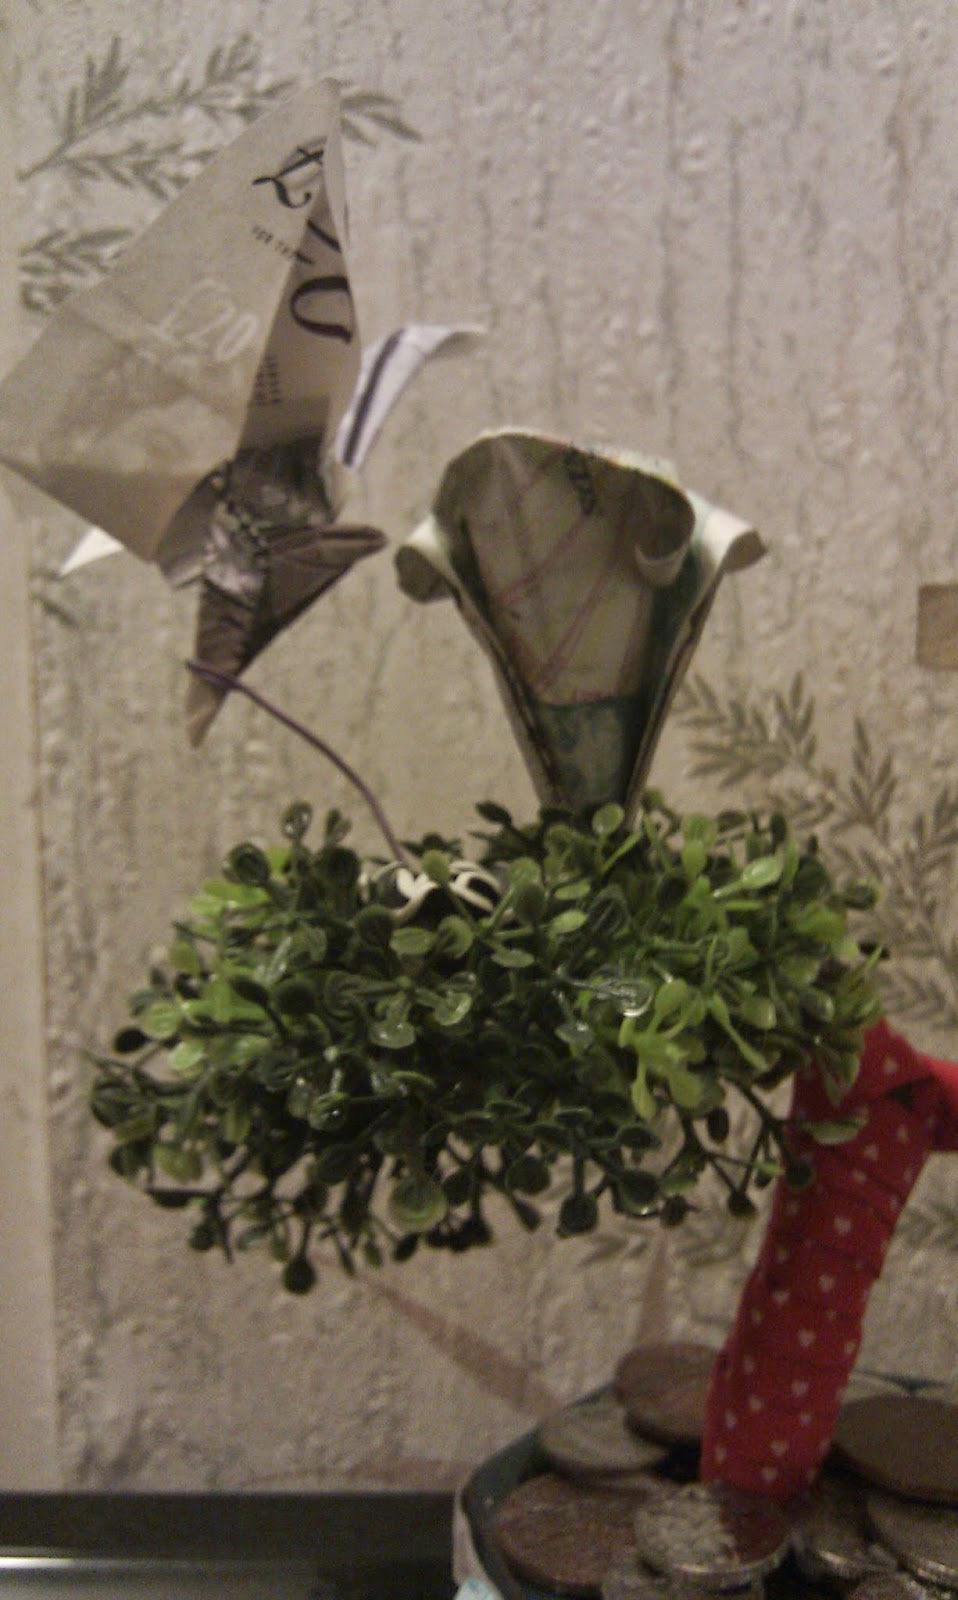
The other project I had was to find a gift for a friend's wedding. I had wanted to get them something special but at the same time I knew that some money would probably be the best gift for them: but money in a card just looks a bit like no effort put in. So I started to look for ways to present money better.

Then I stumbled upon this video:


I had some practice with paper and once I could do that, I used the notes instead. Then for the flowers I curled the corners of some folded notes with a tooth pick , but they needed a base. Which lead me to the idea of creating a money tree.


So one plastic tree, some wire and hot glue later and I had created my own version of a money tree.


 I was happy it was well received. They even thought it was something I had bought  :)


Thursday, 7 August 2014

Day 3

Day three equals tree!

Do you think they did that to make it rhyme? :D

Well just a simple drawing today but a chance to try out my new Sharpies


Monday, 14 July 2014

Water colour pencils

When I was younger I loved to draw and always wanted to try my hand at painting however it was often a messy affair and consequently replace by 'magic painting' as soon as possible. For anyone that doesn't know this basically means using water to paint over some grey pictures to release the colour. So as a kid I was pretty happy with that but it does mean that now I still feel like a small child when attempting to use grown up paints.

Then I started to notice more craft projects were using water colour pencils and wondered if these would help me get back my art groove, and I am glad to say that I am now a convert!

Well thanks to some great inspiration and tutorial videos found on the net.

The pack of pencils from WHSmith that are currently on sale

Video tutorial from the fantastic Frugal Crafter:
https://www.youtube.com/watch?v=91vHOqZYo38&sns=gp

My efforts after watching the video


And beginning to get a little more practice; inspired by Leonardo Pereznieto  https://www.youtube.com/watch?v=TxLUb0PYmPY


Before adding the water
After the water & added a border of blue around the fish

 My thanks go out especially to -

 Bob Davies for showing the basics:

Lindsay The Frugal Crafter - For an amazing assortment of craft tutorials & an addictive blog <3

Leonardo Pereznieto for sharing videos on his fantastic artwork


Tuesday, 27 May 2014

Painting practice

So I came back to find my poor lil rabbit in pieces, so I guess I will have to apply a few tweaks next time around.  I was able to stick him back together with some glue but in the process the poor soul lost his tie :(


After a lot of deliberation I thought I might as well have a go at painting them. And I know I am not so good at this but I guess the practice won't hurt and I don't think I ruined them too much. Although I did try to use two tone painting and now I am not  sure whether it adds to the piece or just makes it look badly painted oops.


I think I need a better fine brush before I attempt to paint the clock face but by then I can hopefully track down a leather or fabric scrap that I can make him a new tie from so his neck doesn't get cold :)


Late for a very important date!